

Hey! Glad you are here and hopefully taking part in the watercolor portrait paint along. 🙂 If not, just sit tight and watch me go.
You can find the more detailed instructions here for the paint along and I have added the reference materials to download in here.
We will be painting a simple portrait together using watercolors.
Now, do one step at a time before heading over to the video:
- Pick a palette that you will be using for this challenge. Just pick one and stick with it.
- Pick a palette that has somewhat versatile colors. Do not think any further than that, the number of colors or size of pan does not matter.
- only note I have is that maybe not pick a one color palette (nearly the same colors), or palette with only very light or dark colors alone, or only granulating colors palette
- fyi: I picked a quite muted Essee watercolor palette (12 pans). I chose it to test out the colors of the new palette
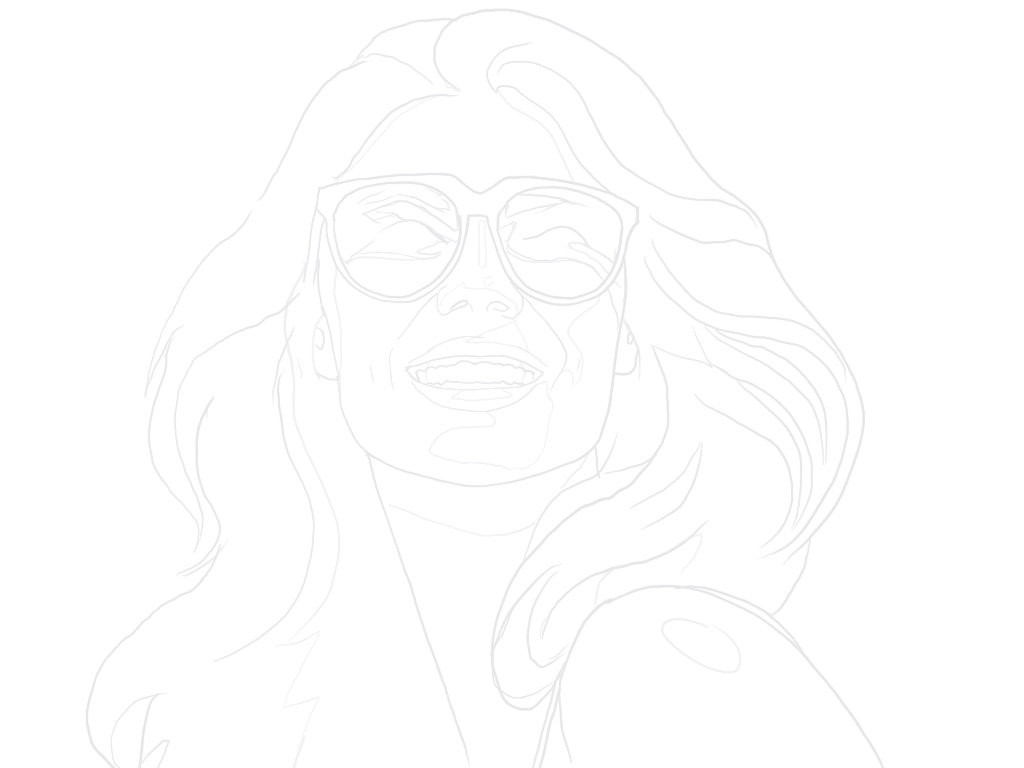
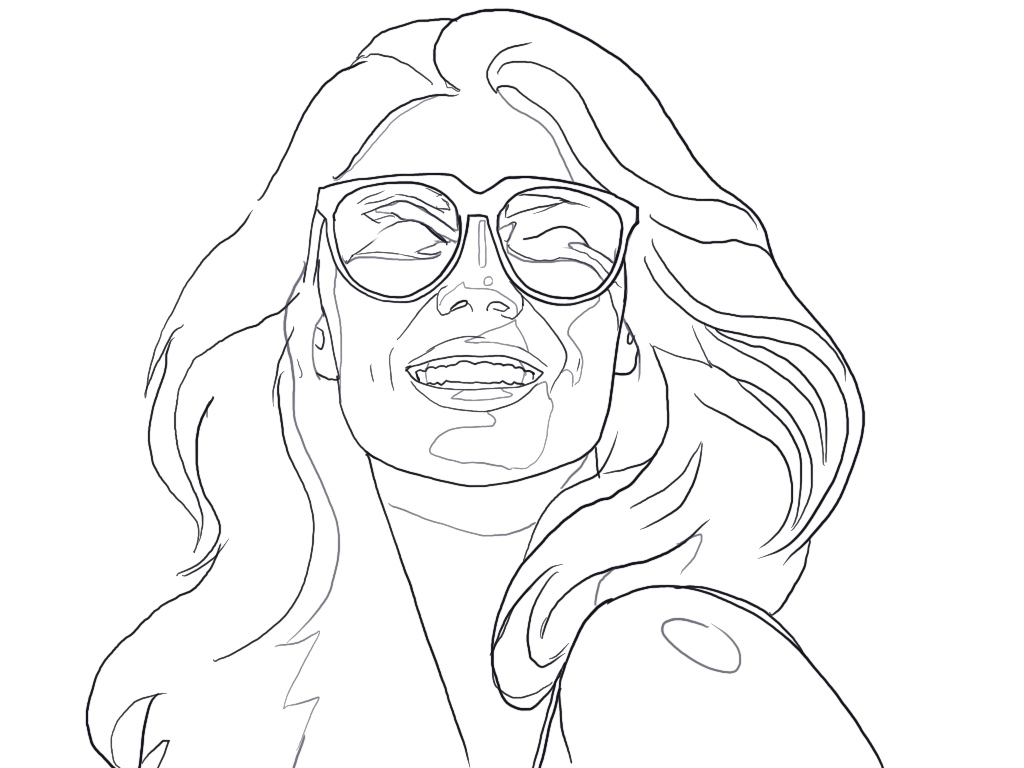
- Go ahead and download the reference image and line art
- Get painting materials ready, set up your painting space
- pick your watercolor paper and size (e.g. A4 or smaller) -> note tracing (part 4)
- I like to use smooth surface and 300GSM papers
- I used now: ST Cuthberts Mill Bockingford Traditional Watercolor Paper – HP White, 260mm x 180mm (10″ x 7″), 300GSM and I taped it onto a cardboard
- have also some scrap paper to test colors
- I like to use smooth surface and 300GSM papers
- pick you brushes, preferably one bigger, medium and a small detail brush
- I used two round brushes and a tiny detail brush (Polina Bright round brushes 1 and 3, and a Raphael 3/0 precision brush (which is not that great for watercolor)
- get you water cup(s) ready with clean water
- I usually use one for more dirty water where I often dip brush and one for more clean water
- note: in this I mostly just used the one cup though
- other
- pencil (H) and an eraser (for drawing sketch / line art)
- have a paper towel available for blotting excess water and cleaning brush
- Optional: pipette is nice to easily transfer water to mixing palette, but brush will do also (just slower). A hair dryer to quickly dry your painting when needed. (I use it in the end before final details)
- pick your watercolor paper and size (e.g. A4 or smaller) -> note tracing (part 4)
- Trace the image or line art as you prefer onto your watercolor paper (NOTE: Keep the lines light, do not press hard, preferably use a harder pencil (H) so you will not create a more easily smudging and too dark line art with softer pencils)
- you can trace the line art, or the reference as you want
- e.g. I used quite a small paper, so I just traced the image from my iPad with the light on 100% so the reference was showing through the watercolor I placed over the screen. Well, well enough at least (the iPad will register your movement through the paper so it is a bit tricky though)
- or you can trace against a window (during day, against light), or use a light table if you have one
- or you can, if your printer can manage watercolor paper (thickness), print the lighter line art straight to you paper.
- but note that you cannot erase any lines afterwards. Fade the line art for printing more if needed, test print on normal paper first. Or when painting, then you need to use heavier consistency of paint to cover the lines
- NOTE: If you print out the images, just remember to turn printing paper orientation and fit the image to the used paper size
- you can trace the line art, or the reference as you want
- Have your watercolor paper with the sketch and materials ready for the paint along
- tip: Maybe tape your paper to a backing board before starting painting. Otherwise you can see some buckling of the paper. Do not use a heavy/huge board, so that you can turn the paper around while painting, if you want to or need to
- Alrighty then, we are good to go. Now head over to the paint along video:
Let me know in the video comments, or here, or Instagram if you completed a painting, so I will check it out 🙂
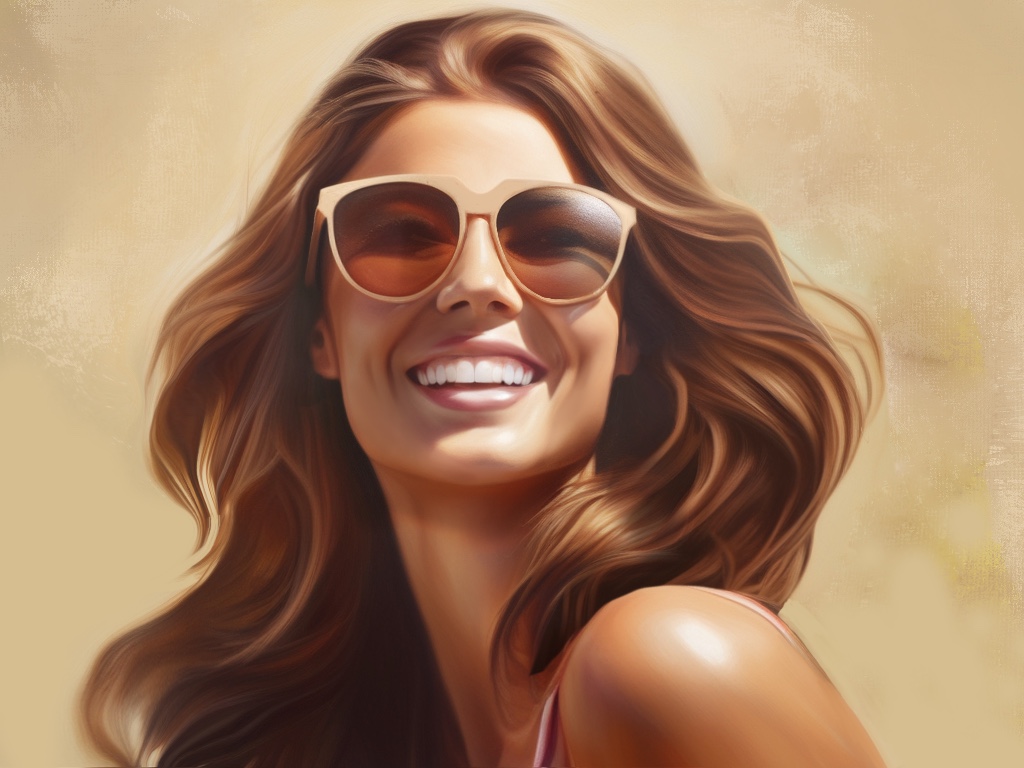
Also, A little background on the reference. I wanted to use a smiling woman in sunglasses. Instead of finding an image I can use and share with you, I generated a reference image using AI (Leonardo AI). I chose one of the options I created and reworked it in Procreate on my iPad. Here you can see the original wonky and wild AI monster (left side) and then the edited image (right side):
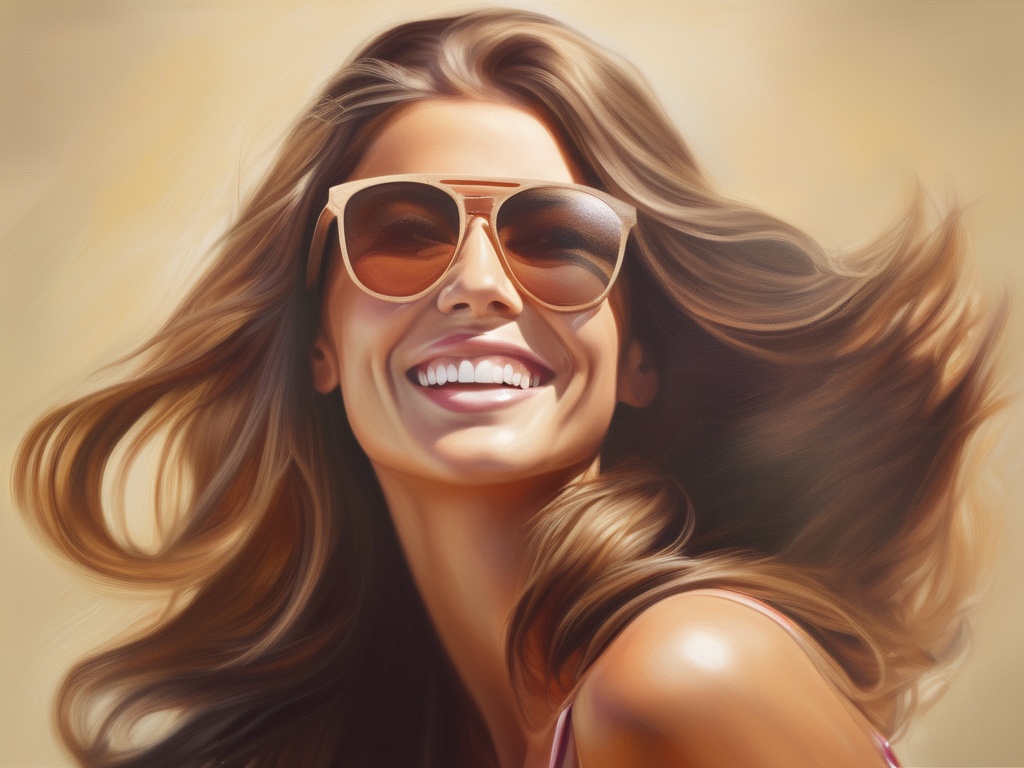

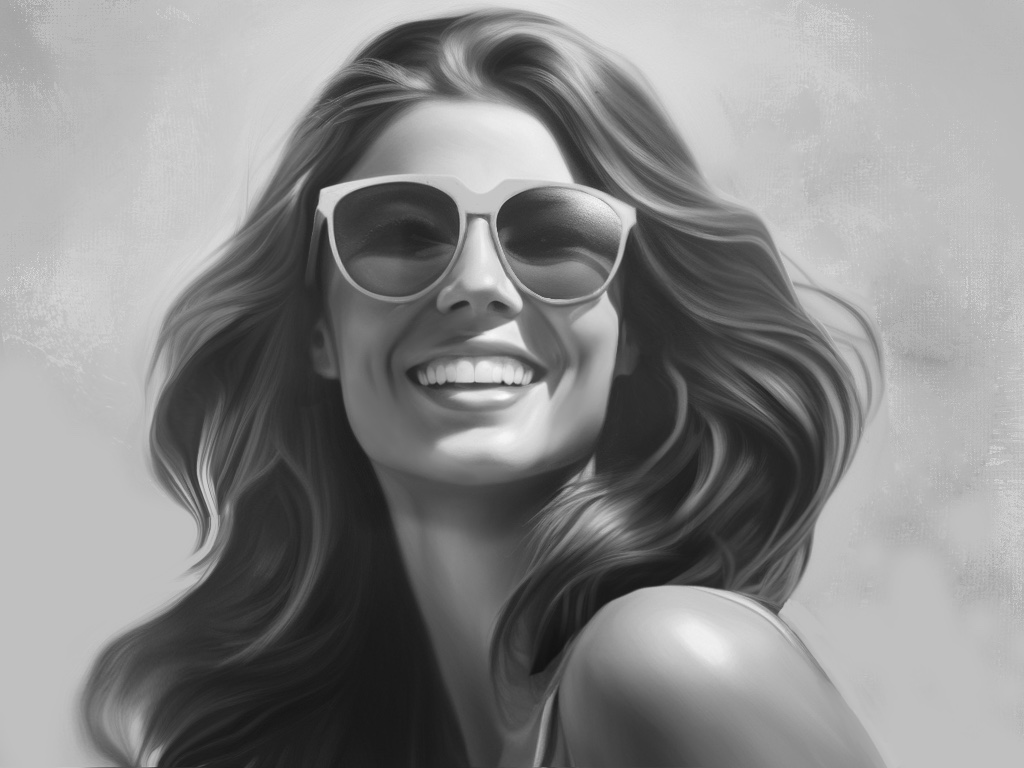
All reference images here as well:
You can see my finished painting in the video 😀 (and eventually in Instagram)
Thanks! ❤

Leave a comment